
How to Read the Fortune Gems 500 Screen
Read the Fortune Gems 500 screen by zone instead of taking in one burst of colour. Start with context and cost, move to the 3×3 result and special fourth reel, then finish on settlement. This order keeps feature animation from outrunning the facts.
Zone 1: before the active screen
Both opening states orient the reader; neither yet requires the full screen-reading sequence.

First confirm the title here, before balance, bet and result areas demand attention. Availability, eligibility, cost and outcome are outside this opening view.

In the portrait layout, Continue appears before the active interface zones. A browser viewport cannot prove physical-device support, touch response or performance.
Identity and intent
Confirm the title at the play gate. The portrait introduction then shows how the game is presented before controls appear. That is all these states prove: they reveal neither a future outcome nor casino eligibility.
The Continue control
Continue only when the purpose is clear: learning controls, checking a rule or observing responsive layout. The official demo guide explains how to close those tasks without turning spins into a probability sample.
Zone 2: balance, bet and win
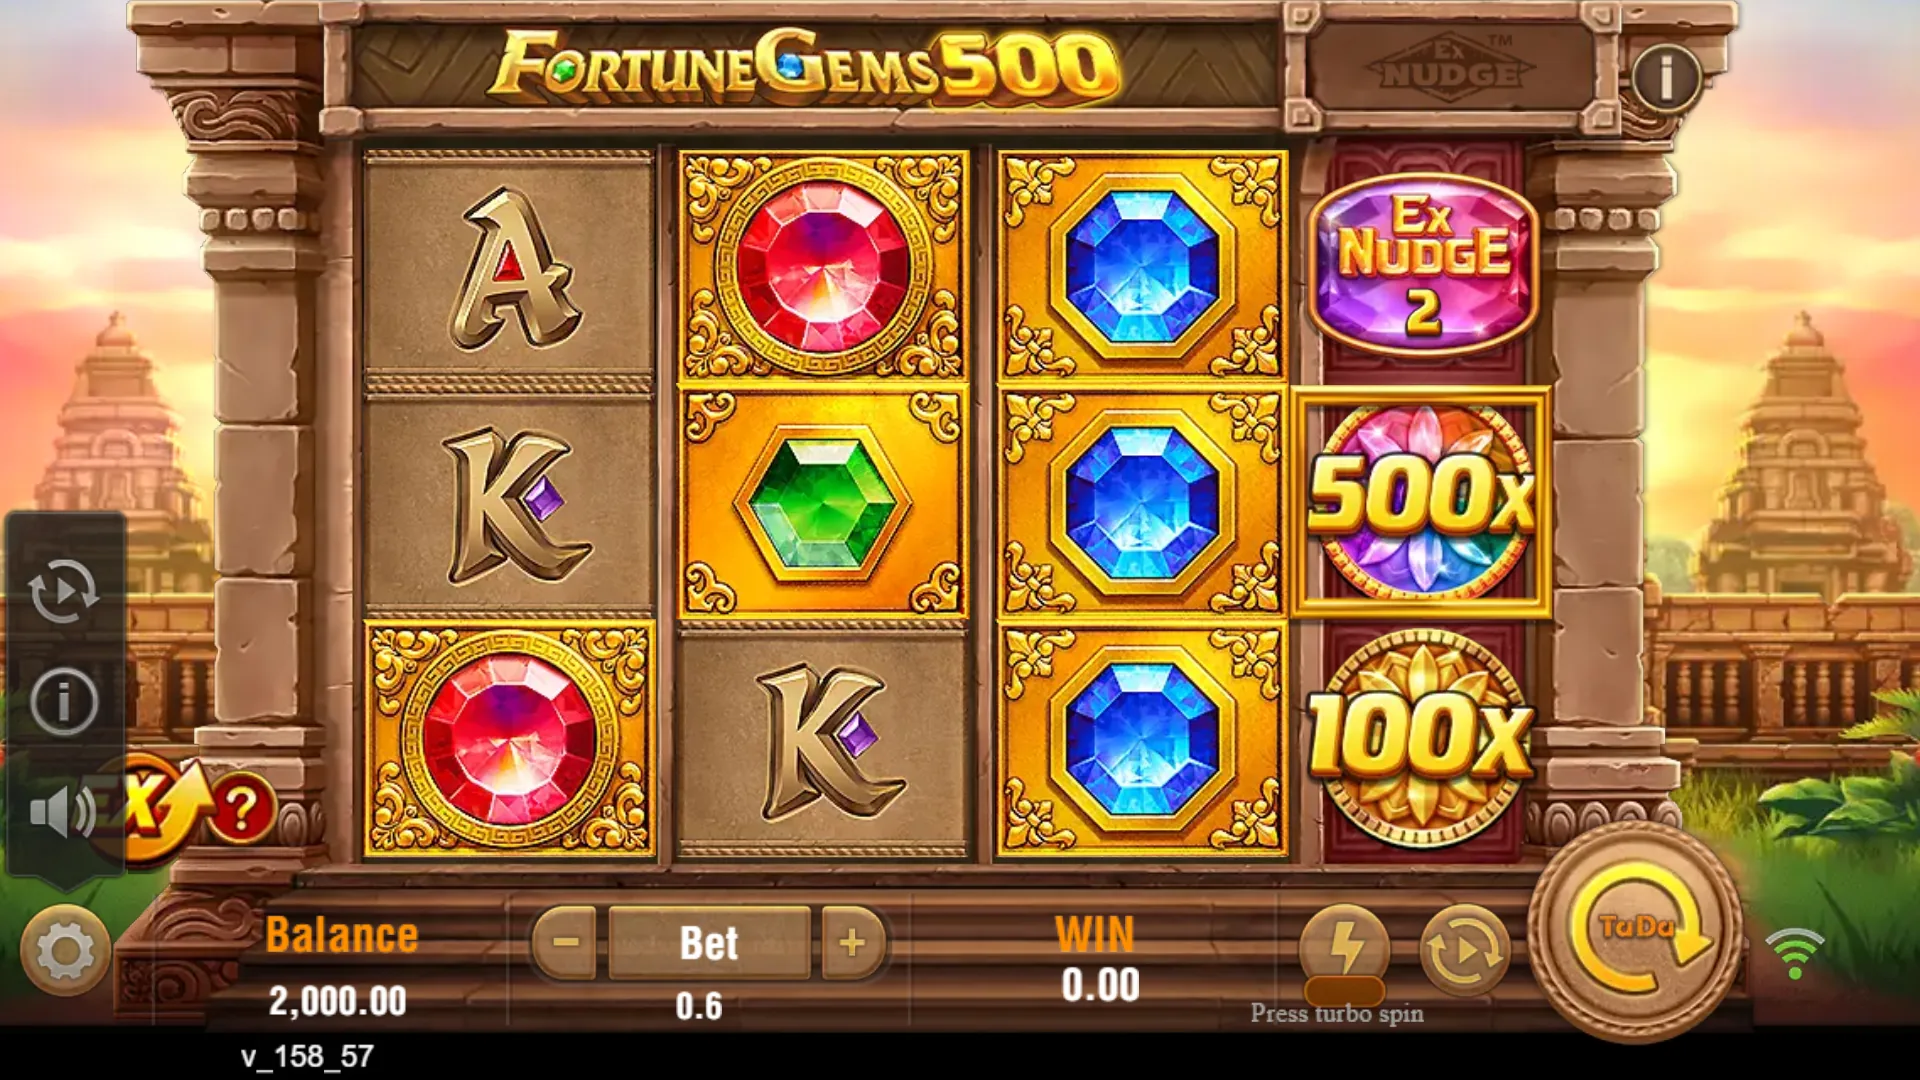
In the full frame, Balance, Bet and WIN sit beneath the primary grid and special reel. One pre-play state tells us nothing about settlement, typical outcomes or a universal bet range.
Before the spin
Read balance and total bet together. If an optional mode changes cost, understand the new total before acting. No universal bet range is available here, so use the live display for that instance.
After the spin
Return to the win and balance only after animation ends. A feature number may be part of the calculation, but settlement is shown by the completed fields. Comparing the before and after states is safer than interpreting motion.
The next two views serve different purposes. Use the annotated map to locate the controls, then the HUD crop to compare the before-and-after checkpoints without surrounding distractions.
Find the fields in the wide frame. Then use the crop to follow cost through to settlement.
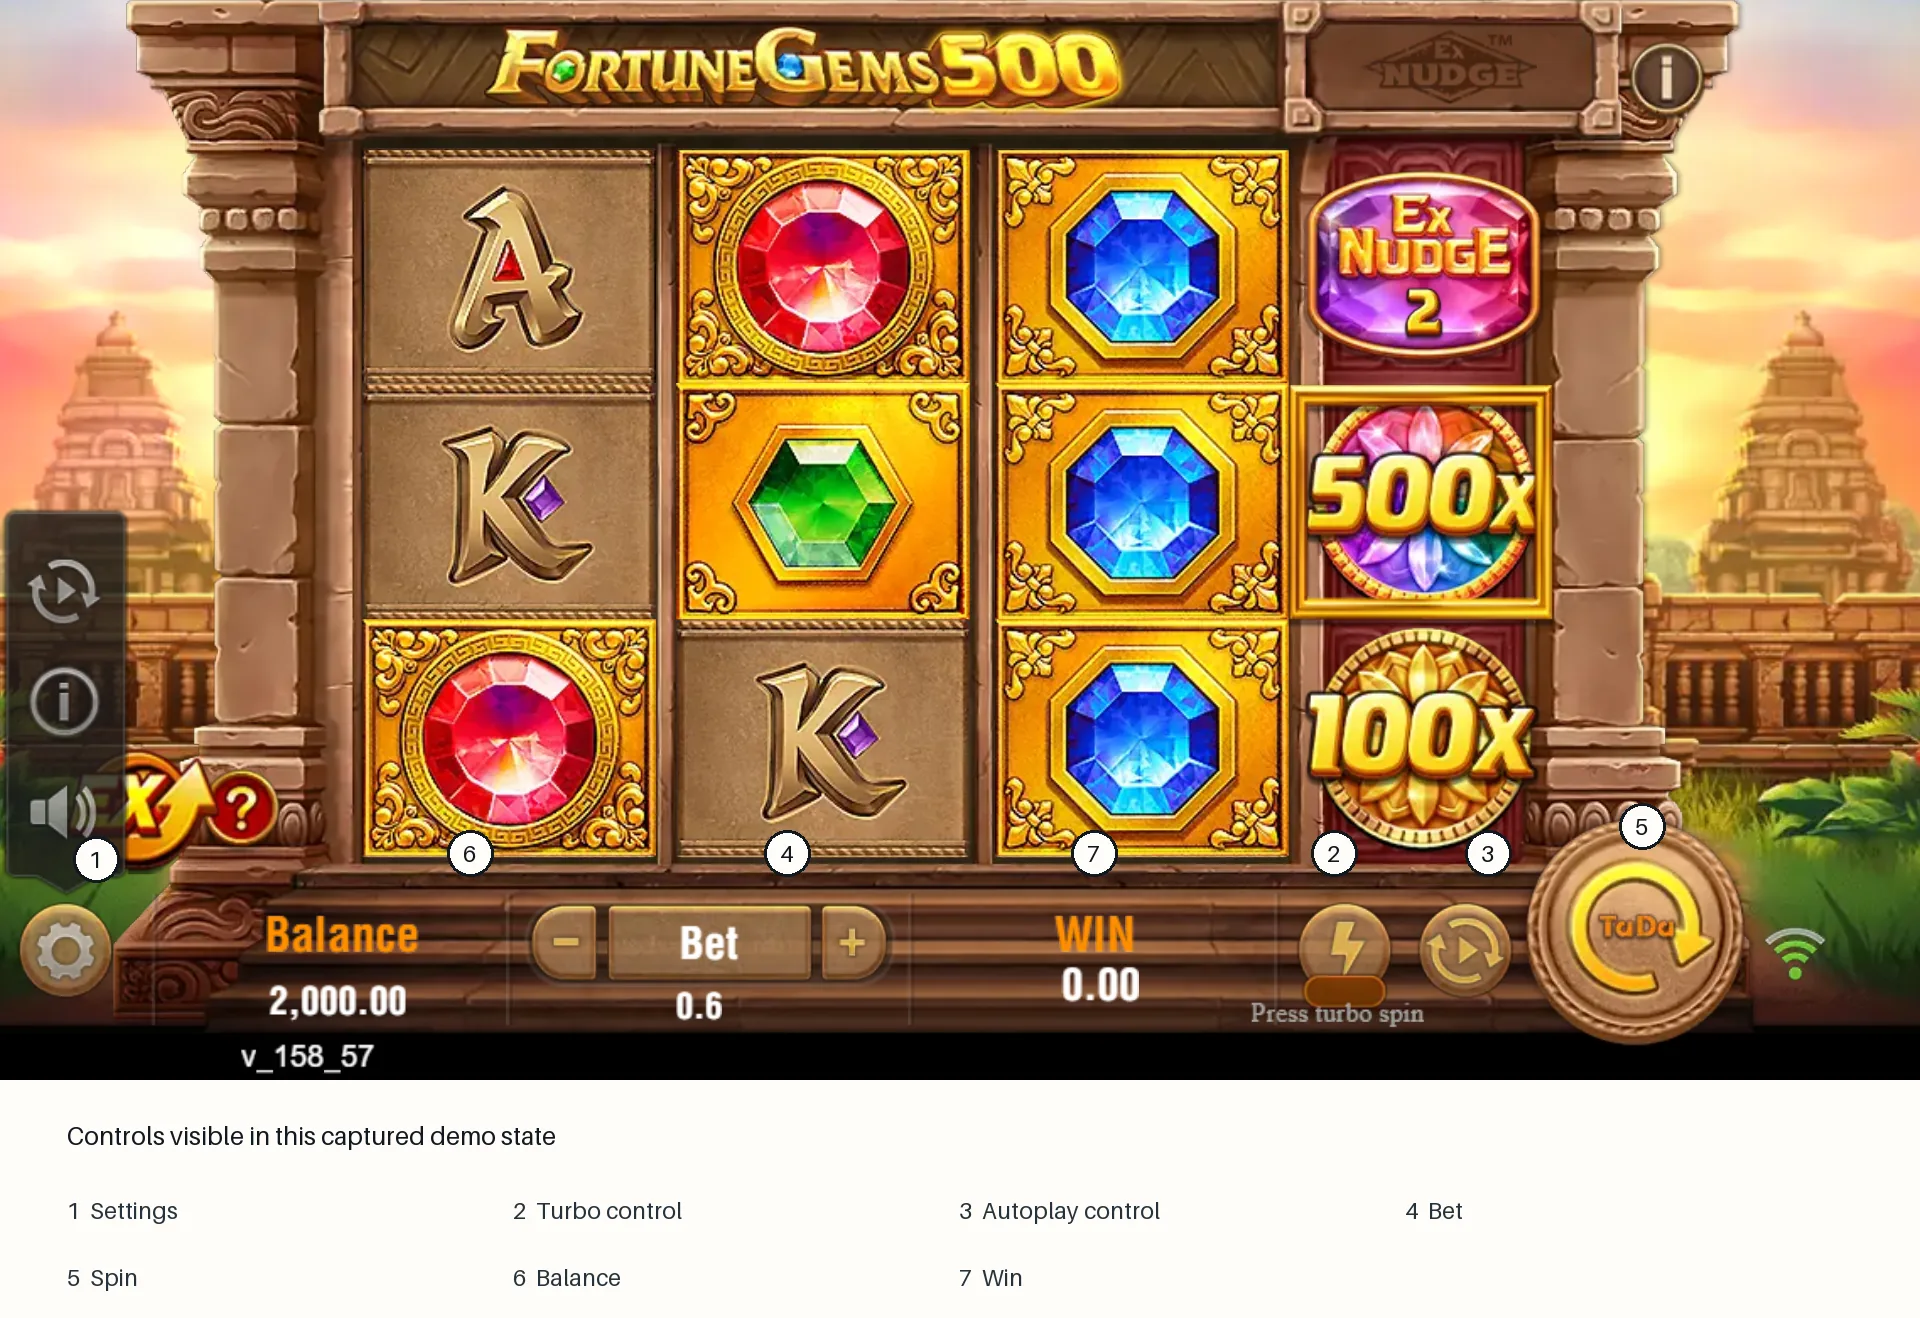
The labels place Bet, Spin, Balance and WIN in relation to the other visible controls. Do not use this map to infer defaults, universal control availability, settlement or odds.

The crop separates the pre-spin amount from the fields that matter after animation. Because the result has not settled, it supplies neither a cash value nor a universal stake range.
Zone 3: the 3×3 primary grid
Nine positions, five paylines
The base area is 3×3, with five paylines. Those facts give you the field size and line count—not every path or symbol value. Check the active paytable before calling a visible arrangement a winning line.
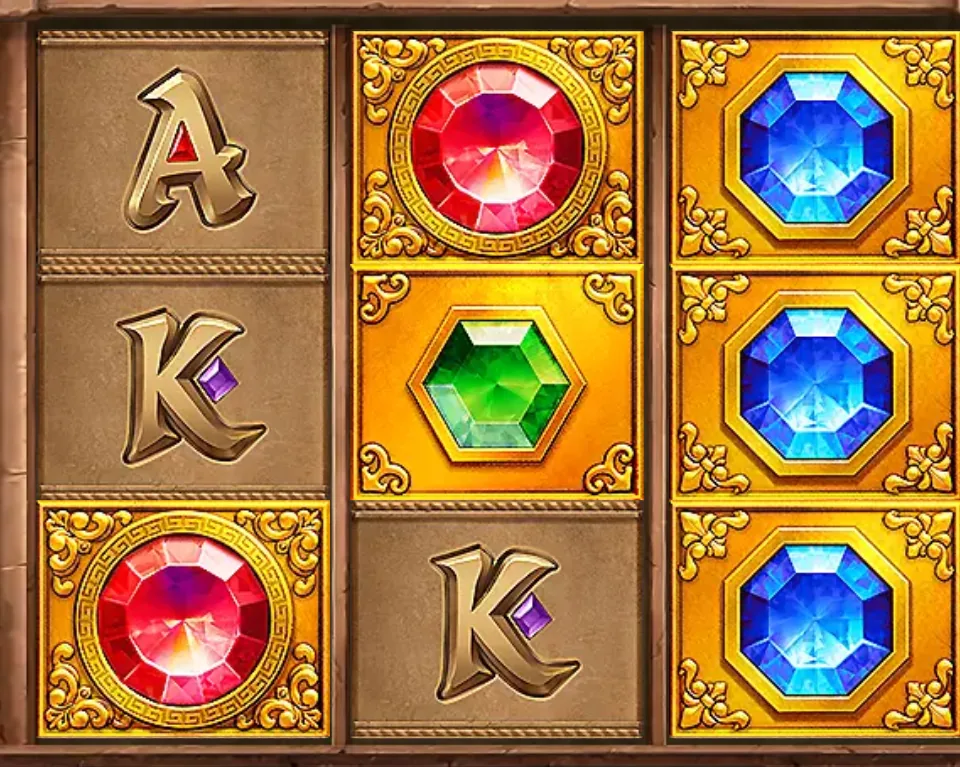
This crop keeps all nine primary positions visible and the special reel out of the grid. The arrangement alone reveals no line paths, values, frequency or settlement.
Wild recognition
The rule states that Wild appears on all reels and substitutes for all symbols. Read the wording below instead of guessing from the icon’s artwork.

The panel confirms Wild's stated substitution role in the grid or special reel. Symbol values, full payline conditions, frequency and any rules outside the view remain unresolved.
The missing calculation layer
Still missing are exclusions, values and the complete payout table. A valid calculation needs the listed symbol award, qualifying count, line condition and payout unit. The paytable checklist covers each field.
Zone 4: the special fourth reel
A different job from the grid
The narrow reel is the feature axis in the 3+1 layout. TaDa Gaming names Full Symbol, Multiplier and Nudge / Ex NUDGE. Read its displayed state, then use the rules to see how it interacts with the primary result.

The narrow strip carries Ex NUDGE and multiplier labels apart from the primary symbols. A still view leaves the active state, trigger, application and frequency unanswered.
Large numbers need context
Multipliers can reach 500× on the special reel. A visible multiplier is not automatically a final 500×-of-stake win, and it is not the same as the 12,500× total-bet game cap. Wait for application and settlement.
Reading feature cues without over-reading them
| Visible cue | Careful reading | Do not infer |
|---|---|---|
| Multiplier value | A feature value in the current state | Guaranteed final award |
| Ex NUDGE text or movement | Nudge-related interface feedback | Trigger odds |
| Expanded or repeated symbol | Possible Full Symbol feedback | A complete payout |
| Extra Bet highlight | Optional mode may be active | Price or return unless displayed |
Zone 5: responsive layout
Notice what survives the reflow at each recorded browser viewport. Handset performance is a separate question.
At 430×932, the narrow introduction keeps both the title and Continue control visible. This repeated viewport example answers a layout question only; it is not a physical-device test.
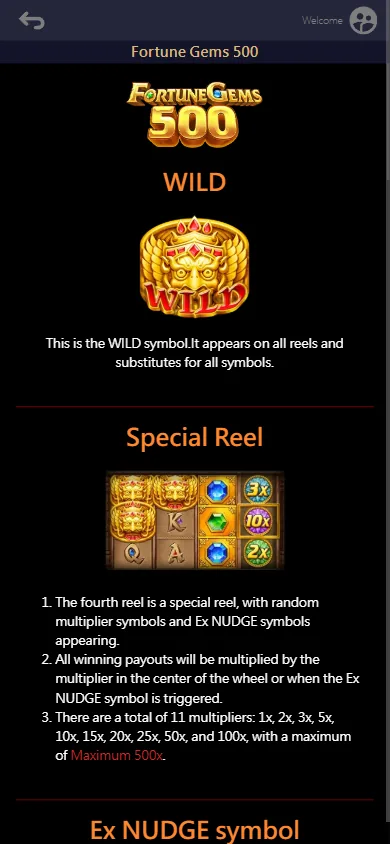
At 390×844, the Wild wording remains available in the narrow help layout. Touch behaviour, performance, browser coverage and the rest of the rules are untested.
What stays legible
The Continue control and Wild wording remain visible in the captured portrait layouts. The same introduction and help structure can therefore be recognised at the recorded narrow viewports.
What remains untested
These browser viewport captures say nothing about performance on every physical handset. Touch accuracy, rotation behaviour, loading speed and compatibility across mobile browsers all remain untested.
A three-moment reading habit
The screen-reading sequence
| Moment | Primary question | Screen zones |
|---|---|---|
| Before | What will this action cost? | Balance, total bet, optional mode |
| During | What state is the interface showing? | Grid and special reel, without premature valuation |
| After | What actually settled? | Win and final balance |
If the display is ambiguous
Pause and open help. Do not invent a feature trigger or borrow a familiar rule from another slot. A screenshot preserves the state for later comparison; missing rule text stays missing.
If the pace is too fast
Use manual play and stop. Faster presentation does not improve odds and can make cost and elapsed time harder to notice. The step-by-step play guide keeps each action separate.
Finish on settlement, not spectacle
The screen directs attention towards symbols and feature values. Redirect yours to cost before the spin and balance after it. Between those checkpoints, the grid and special reel explain what happened; they do not promise what comes next.